Photoshop CD Tutorial
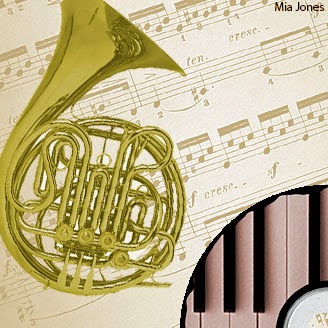
Firstly, I uploaded the images such as the horn and the CD and then inserted them onto photoshop from a pen drive. I then selected the spaces I wanted to cut out of the images by using the magic wand tool, for example the backgrounds of each image by simply clicking on the unwanted areas. I then placed the images onto the background design of music notes, I used a dragging motion to succesfully place them in the desired area, where I wanted the DC and horn to be presented. After this I began to free transform the images to change their size and to rotate them, I think this helped to make the design look more effective. I also changed the colour of the horn and the CD by clicking on the color option on the right hand side tool bar and chose the colours I thought were the most realistic and effective. I also inserted my name using the text tool in the sidebar, I was instructed to type my name. When it came to saving the document I converted it into a jpeg by using the drop down arrow and selecting jpeg. I am not happy with my overall design because I thought it was very difficult to find certain tools to get the desired effect I wanted on certain aspects of the design however I feel that after this first lesson I am definately more confident with photoshop and I feel my skills have improved due to the fact that I have learn where some useful tools are.
No comments:
Post a Comment